
This is a gift of love. But if you can sew a straight stitch you too could make a custom Crib bed set.


First carefully cut your selected pieces of fabric. Ann Marie wanted an ivory, khaki and white color bedding.
Here is all the pieces you need for one bumper. Remember she is having twins, I had to make two sets.
We started with a plan.

Cut your pieces to form the backs and fronts of the bumpers. I did have to trim a few to the correct dimensions.

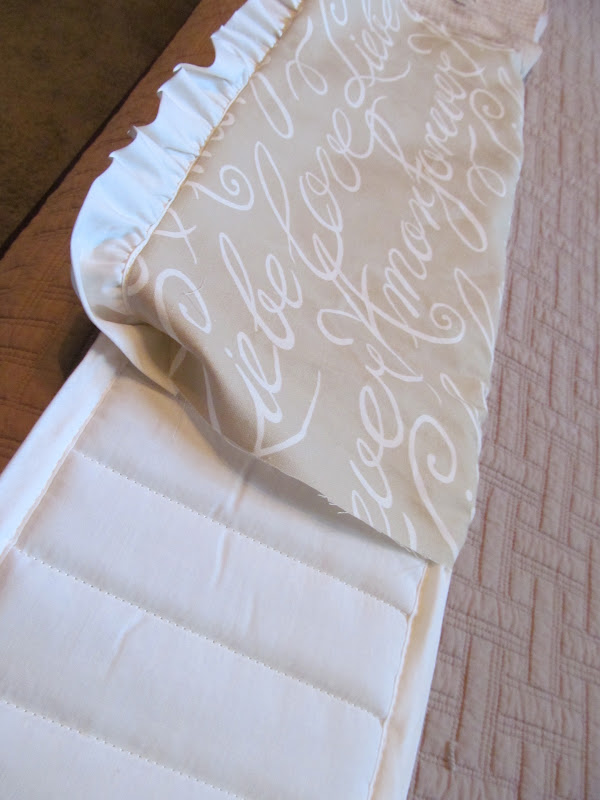
After sewing the strips together, I added a pre-ruffled ribbon to the tops of all four sides. Pin rights sides together.

This is how is looked after the ruffle was added. Then I finished sewing the other two sides. I flipped it back to rights sides together and sewed the long side and one end closed.

Finished block patterns with ruffle.

I then inserted an IKEA bumper form to give the sides some stability.
The messy part. I stuffed each section with polyfill. I bought a huge box of the stuff on clearance at Michael's. On the long sections I left an opening that I hand-stitched closed once it was stuffed.

I added satin ribbon to the corners and middle to attach to the crib.

Tadaaa......
This is the side that you will look into the crib and see.
This is the side that you will look into the crib and see.
Next up the dust ruffle. You have to have one of those too.
Here is sneek peek of the other finished set on one of the cribs.

Here is sneek peek of the other finished set on one of the cribs.

I used - for two sets including a flat (not ruffled) dust ruffle
Four yards of the love fabric
Four yards of the soft chenille
1 yard of the satin fancy (all that was left at the store)
polyfil
2 IKEA bumpers
5 yards of ruffled fabric trim
12 yards of satin ribbon for ties
Another really great tutorial here, that I found on Pinterest.
Sharing with:
Debbiedo
Nifty Thrifty-tuesday at Coastal Charm
Between Naps on the Porch
Cowgirl UP
Savvy Southern Style
2805 - potpourri Friday
At the Picket Fence
My Favorite Things
Debbies Pinterest Party
Donna at Funky Junk Interiors
THAT is absolutely beautiful AND adorable. How exciting- two little bundles of baby to love- xo Diana
ReplyDeleteI won't be making any crib sets, but these are beautiful. Two for one ~ isn't that exciting!
ReplyDeleteSo sweet and adorable, Lori! I love the combination of fabrics. You are in for SO MUCH FUN!!!
ReplyDeleteThey turned out great! I'm sure everyone is getting very excited:@)
ReplyDeleteThat is precious! You are such a good Lala!!!
ReplyDeleteI LOVE it!
ReplyDeleteLori this is gorgeous. I can't sew a stitch let a long a straight line. This is super. I am so glad you joined me:) Have fun and meet some new peeps.
ReplyDeleteI don't know if I could do this, but you did a FABULOUS job. This is beautiful. I love the colors.
ReplyDeleteYour bumper pad is sew cute! You did a terrific job with a great tutorial.:0)
ReplyDeleteLooks fantastic!! Found you via Coastal Charm!
ReplyDelete--Fotini { http://glamorousbride.blogspot.com }
That is so pretty. Love the monogram.
ReplyDeleteSo very pretty...love the monogram!!
ReplyDeleteBlessings,
Linda
very cute.
ReplyDeleteI supposed I am too old for a crib bumper???!!??? But I would love one of those for a long bolster on my bed!! FAbuLOUS!!
ReplyDeleteThis is precious, Lori! You have done a beautiful job! Thank you for sharing your charming project at Potpourri Friday at 2805!
ReplyDeleteLori that is gorgeous!!! It looks so soft and elegant and I love the monogram. What a special gift. :-) Thanks so much for sharing it with us last weekend at Inspiration Friday!
ReplyDeleteVanessa
Hi, Lori! BEAUTIFUL! You did a great job. I'm a big advocate for monograms and I love this way this crib set turned out!
ReplyDeleteLori, this is fantastic!! your newest follower!
ReplyDeleteJan
door251.com
I pinned you too!
ReplyDeleteanyway to find out where this fabric came from? <3
ReplyDelete